The purpose of this content is to assist you in taking your first steps into the universe where The Pouch emerges. In the upcoming phases of the project, we will provide more videos, guides, and articles to help you comprehend all the tools that make up The Pouch.
Therefore, the content below is provisional and provides useful tips for using the Galxe, Alphabot, and Discord platforms. Welcome to the Pouch Kingdom!

The Web 3 Community Platform
Galxe stands as a leading Web 3 community platform, offering projects the capability to gamify engagement through whitelists or giveaways featuring USDT, Drops, and other tailored prizes.
We chose Galxe because it is a widely used tool in the Web 3 landscape, known for its security and user-friendly interface.
We chose Galxe because of its widespread adoption within the Web 3 ecosystem, acclaimed for its robust security measures and user-friendly interface
1. Social Login on Galxe:
Log in with Discord, Twitter/X, or email. If you don’t have a wallet, no worries! Galxe supports social login, using email or social media accounts for registration or signing up.
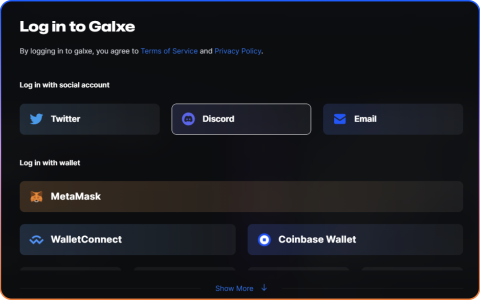
Objective of Social Login:
Social login allows you to create or access your Galxe ID through existing social media accounts, providing a secure and hassle-free experience without the need to connect your wallet.
Step-by-Step: Using Social Login
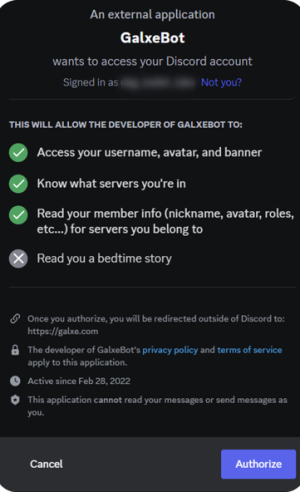
Discord
Choose “Discord” in the login options, click “Authorize” to link your Discord account to your Galxe ID.
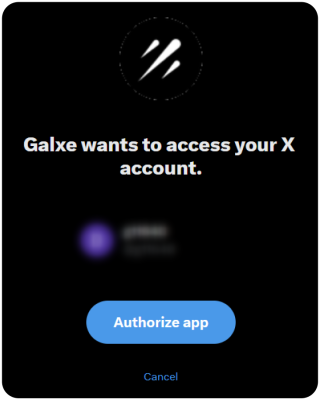
Twitter (X)
Click “Twitter” in the login options, click “Authorize application” to link your Twitter account to Galxe.
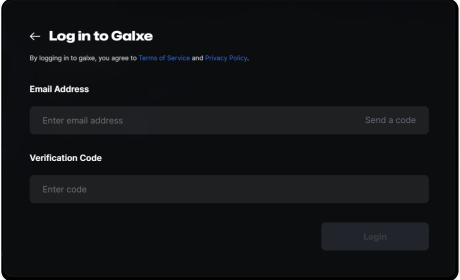
Enter your email address, click “Send code” to start. After receiving the code, enter it and click “Login” to connect to your Galxe account.
Important Notes on Social Login:
Changing account linkage may result in the loss of claiming rewards from previous campaigns
2. Wallet login:
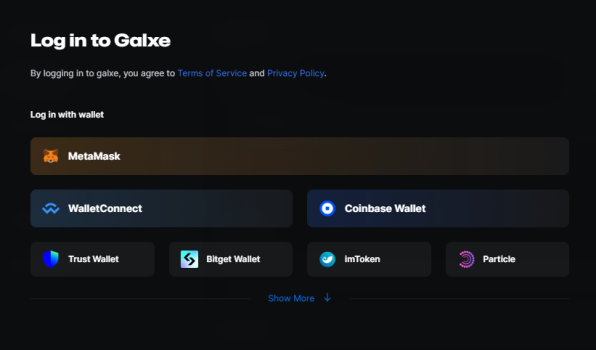
Galxe supports various wallets, including Metamask, Wallet Connect, Coinbase Wallet, Trust Wallet, etc.
Connect an EVM-compatible wallet before linking another type of wallet, such as Bitcoin.
Access your profile settings to link additional wallets.
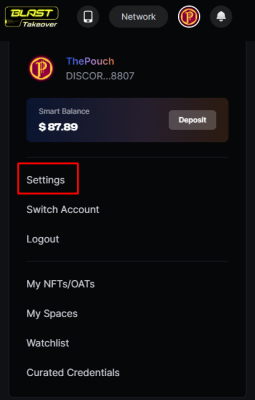
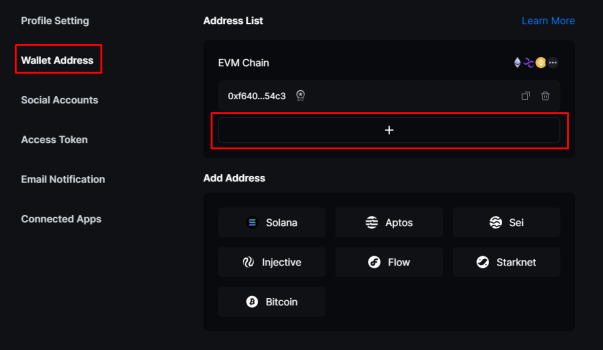
Click on “Wallet Address.” Pay attention to clicking on the “+” icon within the section that indicates “EVM Chain.”
After that, select the desired wallet and proceed with the signature.
03) Linking Bitcoin Wallet to Galxe:
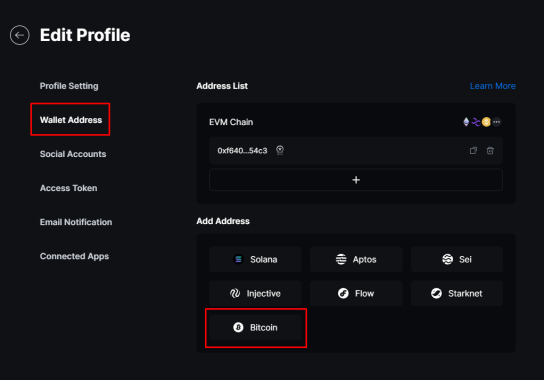
Complete the signature. You may need to do it again, as it is necessary to sign first and then “log in.”
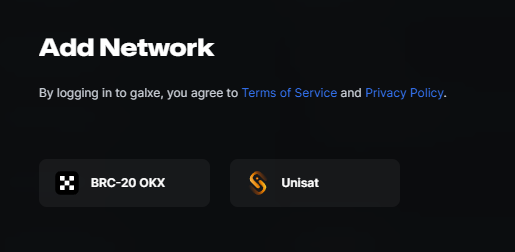
04) How to Use Xverse:
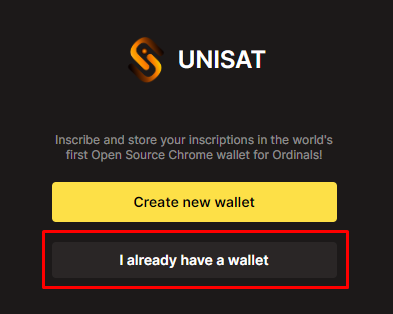
Step-by-step guide to link Xverse to Galxe, including the creation of a wallet on Unisat.
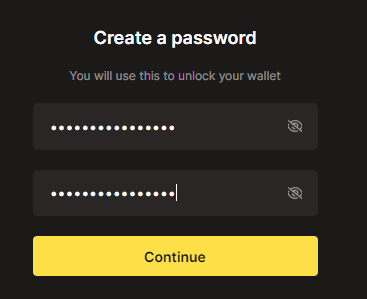
Enter your password. You need to create a password before linking.
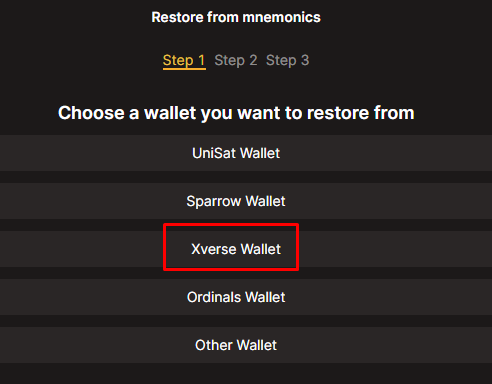
Select Xverse, enter your secret recovery phrase, sign the contract, and switch to Taproot as shown above.
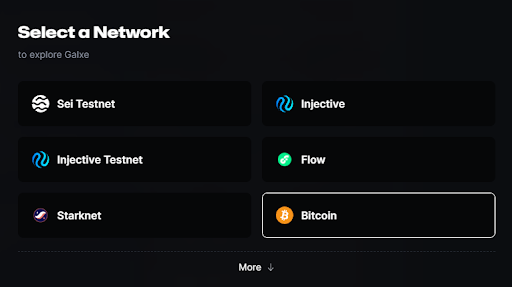
5. Change Your Network

6. Taproot Error
A common error in Galxe related to Taproot occurs when the wallet is not configured in a way that Galxe accepts.


Done! Your wallet is now in Taproot P2TR.
Participating in a Campaign
Campaigns on Galxe provide rewards and points based on tasks you complete.
1. Our space
Check all active campaigns in our Galxe space at ThePouch.
2. Entering the Campaign
Some campaigns may have requirements to participate, such as Points in the Space. Earn points by participating in campaigns that award points in our space. Campaigns from other spaces do not contribute points to the Pouch space.
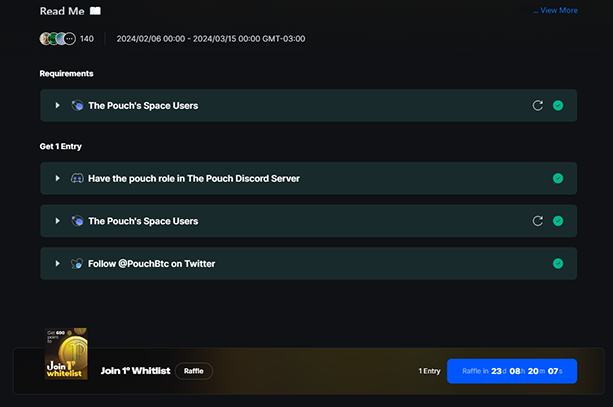
Requirements:
Click to expand and learn more about the requirements. In the example below, it is necessary to have equal to or more than 600 points in the Pouch space.

When you reach the specified score, the requirement will turn green.


After completing the tasks, the Claim or Participate button will become active.
To learn more about the features that Galxe offers, check out their guide at the following link:
https://help.galxe.com/en/

Alphabot is a Web3 platform similar to Galxe, but focuses on Alpha projects and conducts whitelist and drop giveaways with extreme ease.
How to use
1. Introduction
Alphabot is the raffle software of choice for top Web3 communities. Thousands of raffles get created every week and millions of whitelist spots have been won overall.
The video below walks you through Alphabot and how to use it for your first time:
First Time Using Alphabot – User Tutorial
2. Creating Your Account
To set up an account, you can click on Sign In on the top right of any page on the Alphabot website. You’ll be prompted to select a method to sign in (wallet or social account), which will automatically create an account for you – as long as an account doesn’t already exist with the selected sign-in method (if it does already exist, you’ll simply be signed in to the existing account).
You can then proceed to your profile, by clicking on the top right of the window or clicking on the link here, to continue with setting up your account (add signed wallets, mint wallets, social accounts, email address, etc).
Alternatively, if you want to connect all socials right away, you can navigate to https://www.alphabot.app/ connect, where they can connect their wallet, Discord account, and Twitter account to be fully set up and prepared to fulfill any raffle requirements.
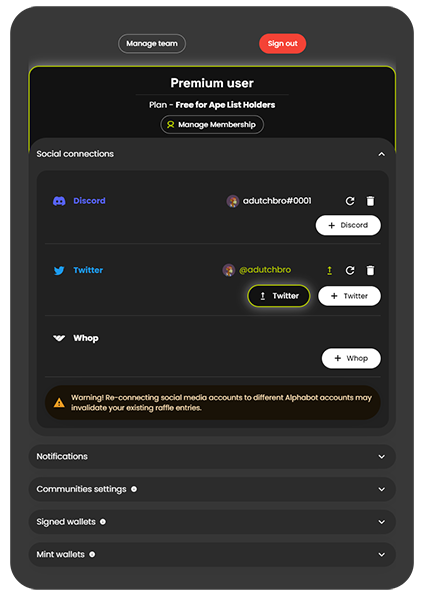
Users can also have multiple mint wallets as well, with a simple dropdown to select which wallet they’d like to submit to a raffle when entering from the main raffle page, as the wallet which will be returned to the team running the raffle in the event of them winning. They can also set community default mint wallets across all blockchains, to prevent submitting the same mint wallets.
3. Connecting to mobile
Once a user has set up their account on a desktop or laptop browser, they can easily connect to any mobile browser using the Mobile Connect button in the header. This will display a QR code and a six-character code the user can use to connect their account to mobile.
Either scan the QR code or navigate to https://www.alphabot.app on your mobile browser and enter the six-digit code and you will be securely connected to that mobile browser with your wallet account!
4. Creating an account on mobile
Alternatively, if mobile is your main platform – you are also able to create a new account on mobile. You’ll be able to sign in on any other device using the same sign in method (e.g. the same wallet address or Discord account).
Entering a raffle
Check out our project with all the giveaways here:
https://www.alphabot.app/
_/pouchbtc
If you encounter difficulties linking your social network and wallet to your account, refer to the guide below on Social Connections.
As long as you meet the entry requirements for a raffle, entering is as simple as clicking on the Register button. If you do not meet a requirement, the requirement will be highlighted in red along with a cross icon on the left of it:

After completing all tasks, verify and click on “Register.”

If you have currently entered, or previously won a raffle for a specific project with your selected wallet, but you select that same wallet to enter a raffle for the same project, then an amber warning as shown below will appear. This is only a warning to inform you and can be ignored if you prefer to continue with the same wallet.
As with all warnings and errors, more information is shown upon hover.
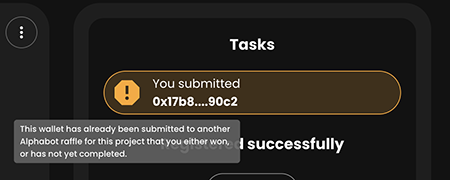
You can access your account settings by following this link or by clicking on the profile image on the top right of your window:
Below is what the user settings window looks like, divided into the following sections (visit the individual pages to learn more):
Social Connections
Social Connections is the first section within Account Settings
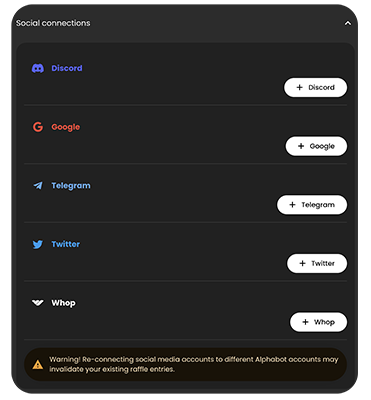
You’re able to connect multiple Discord accounts to your Alphabot account. You can use all of the Discord accounts to enter raffles. Each time when you enter a raffle, you’ll be able to select which Discord account you would like to use – or you can set a default account per community in the Communities Settings.
The Discord account can be used as a way to log into Alphabot. Please note that each Discord account can only be linked to one Alphabot account at a time.
Once you’ve linked a Discord account, a refresh and delete button appears. The refresh button can be used to reconnect your Discord account to Alphabot, which can sometimes solve Discord-related issues that you may run into. The delete button can be used to remove the Discord account from your Alphabot account.

You’re also able to connect multiple Twitter accounts to your Alphabot account. You can use all of the Twitter accounts to enter raffles. Each time when you enter a raffle, you’ll be able to select which Twitter account you would like to use – or you can set a default account per community in the Communities Settings.
Once you’ve linked a Twitter account, a refresh and delete button appears. The refresh button can be used to reconnect your Twitter account to Alphabot, which can sometimes solve Twitter-related issues that you may run into. The delete button can be used to remove the Twitter account from your Alphabot account.
If you’re a Premium member, you’ll have the option to upgrade your Twitter connection to automatically complete like, retweet, and follow requirements for you. For more information about Premium, please see: Premium Membership.
Please note that each Twitter account can only be linked to one Alphabot account at a time.

We recommend that you always submit a mint wallet that does not contain any valuables, as you’ll never know what potentially malicious mint websites or contracts you may run into. In your account settings, you’re able to easily add as many mint wallets as you’d like across all blockchains.
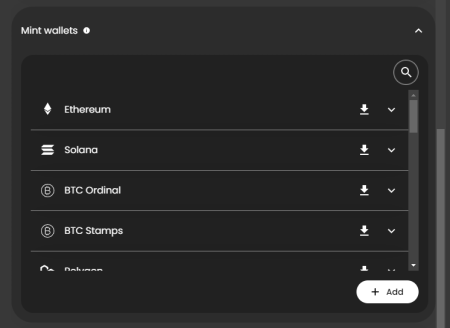
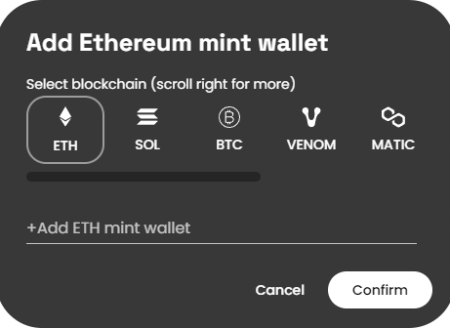
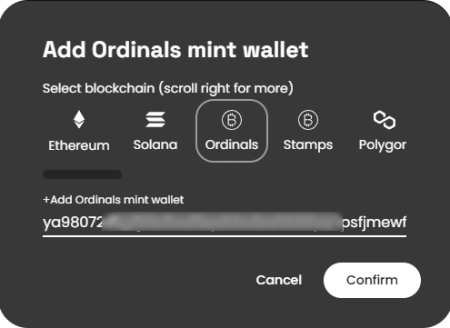
You can easily add a new mint wallet by clicking on the + Add button – which opens up the window shown in the image below. First select the blockchain, then paste your mint wallet address, and click on confirm. There is no need to sign with this wallet address, as this address will not be used to check holder status.
To add a Bitcoin wallet, we need you to verify if you are using Taproot P2TR. Some wallets, like Xverse, already distinguish between wallet models, so simply copy the Ordinals address.
Changing the wallet to Taproot. We will use Unisat as an example.
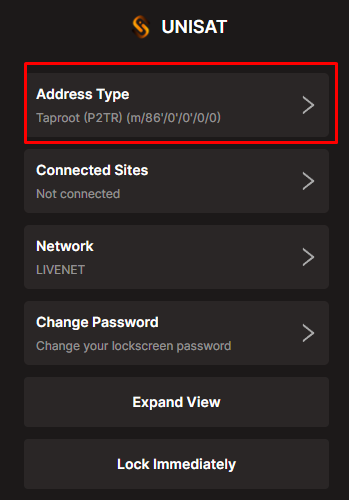

Done! Your wallet is now in Taproot P2TR.
Now click on Mint Wallets > Add.
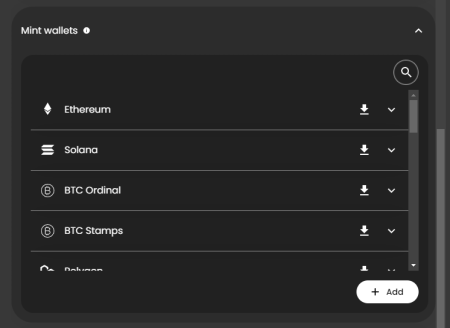
Click on Ordinals > Copy your T2PR wallet and paste it into the field > Confirm.
To learn how to connect and about all the functions of Alphabot, check out the complete guide here.

We use Discord because it is a powerful tool for bringing people together and gathering valuable information, all in one place.
Join our server using the link:
https://discord.com/invite/ThePouch
What Is a Server?
Discord gives you the power to create a guest-only home for your friends or community—a place where you can chat, hang out, and have fun. We call these special places servers, and they look like this:

In our server, it’s easy to join. You will see a welcome screen.
In the channels tab, only rooms will appear:


Click on #Rules to check the server rules.
In the rules section, read carefully and click on Accept if you agree to follow the rules.
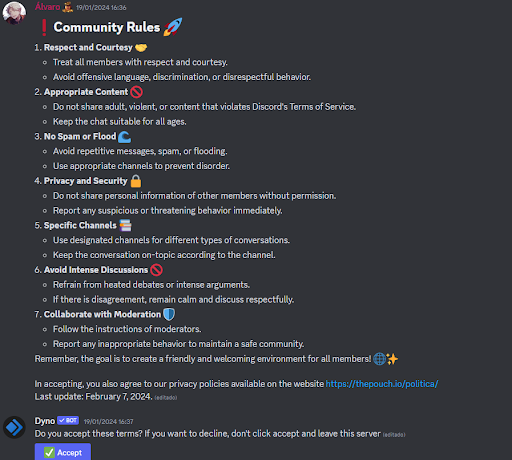

After clicking Accept, other rooms will appear for you! Explore the channels and interact with the community!

Check more information on how to use Discord in the official guide: https://support.discord.com/hc/en-us/articles/360045138571-Beginner-s-Guide-to-Discord